
Showing posts with label RECIPE. Show all posts
Showing posts with label RECIPE. Show all posts
Tuesday, 11 October 2016
COMPETITION WINNING VANILLA CUPCAKES
If you follow me on Instagram you will already know how excited I am about these little beauties:
 They were entered into a baking competition yesterday and they WON! You cannot imagine how joyful I was when I got a call from my husband in the afternoon telling me my cupcakes have won 1st place in the annual bake competition



Wednesday, 1 June 2016
SPINACH AND COURGETTE LASAGNE

Ingredients: *
2 courgettes
a bag of spinach (kale, cime di rapa....)
1 small onion
200gr cream cheese
100 gr grated cheese, divided
1 egg
400 gr milk
35gr butter
35gr plain flour
1 bay leaf
pinch nutmeg
salt
pepper
Method:
Peel the courgettes and cut them into coins. Lightly fry them and set aside on a kitchen towel to cool down. Fry the finely chopped onion until soft and translucent. Chop the spinach and add to the onion until just wilted, 2-3 minutes. Add the cream cheese, some of the grated cheese, freshly grated nutmeg, salt and pepper and mix well. Leave to cool down.
In the meantime make the white sauce. Heat the milk either on the hob with the bay leaf or like me, in the microwave for 2 minutes. In a saucepan melt the butter and add the flour to make the roe. Keep the heat on medium and pour the hot milk while whisking for about a minute until all lumps disappear. Do not worry if some lumps remain, once the dish is baked it won't matter. Continue stirring until the sauce thickens. If it thickens too much, add a splash of milk to it. To give the sauce its velvety texture take the saucepan off the heat and add the egg. Stir until incorporated, add the rest of the grated cheese and leave to melt. Preheat the oven to 180C fan. To assemble: in a shallow casserole dish layer half of the courgettes. Lasagne sheets go on top, followed by a third of the white sauce then half of the spinach mix. Repeat with the rest of the courgettes, lasagne sheets, another third of the white sauce, the rest of the spinach mix, more lasagne sheets. Cover it really well with the last of the sauce and sprinkle some grated cheese on top. Pop into the hot oven for about half an hour and enjoy! It makes great leftover lunch too.


XoXo
Desi in the Kitchen
* This is not a collaborative post. The recipe is adapted from Bob's recipe Courgette & Spinach Lasagne.
Monday, 23 May 2016
SPINACH AND RICOTTA CHEESE CANNELLONI

My husband used to smoke. As a direct result his taste buds were not working properly anymore and he disliked vegetarian food. In fact, he disliked most foods. He wasn't fussy, don't get me wrong. He would eat everything which I would put in front of him but some dishes he simply wouldn't like at all. 19 months ago he gave up smoking for good and I am so proud of him. He was worried he would put on weight, he would binge eat, he would be cranky, grumpy etc etc etc. The truth is he was. He was cranky, grumpy etc etc etc but only for a couple of months. I made sure to prepare healthy snacks for him to take to work and stopped buying ready meals. We were not eating these a lot anyway, maybe once or twice a week. But his desire to eat better and feel better forced him to sign up with the local gym where he is now going for a swim 3 times a week. He quit having 7 cups of tea a day with 2 teaspoons of sugar each! (no, this is no joke!) and he started having packed lunch at work 3 times a week. I am sure you are wondering where I am going with this story. Well, vegetarian dishes are now my husband's favourites. Over the last year he has become a great fan of veggie lasagne, veggie quiches, simple dinners of salads with new potatoes, even vegetarian pizzas! And cannelloni is his absolute favourite. So every time I make it, which is on average once every couple of weeks, I make enough to serve 4. We have half of it for dinner and the rest goes into two Tupperware boxes in the freezer ready for him to enjoy in the middle of day when at work.
RECIPE:
For the filling:
1 pack spinach (kale, cime di rapa....)
1 small onion
1 tub ricotta/quark
salt and pepper
nutmeg
a handful of grated cheese
White sauce:
25gr butter
25gr plain flour
about 300ml hot milk (plus more if needed)
a handful of grated cheese
12 cannelloni tubes
500gr passata
extra grated cheese to sprinkle on top
Method:
To make the filling:
Finely dice the onion and let it fry gently until soft and translucent. In the meantime wash and cut the spinach roughly, squeezing as much water as you can out of it. Add to the onion and stir for 2-3 minutes until it is just wilted. Turn off the heat and add the ricotta cheese, spices and the grated cheese. Stir until all is blended well, the grated cheese will melt from the heat. Leave to cool down for a bit.
White sauce:
Whilst the filling is cooling, melt the butter in a saucepan. Add the flour and some salt and stir until a roe is made. Add the hot milk (I always microwave mine for 2 minutes) to the pan and whisk vigorously for about a minute - you should end up with a nice smooth sauce. Let it thicken slightly, take off the heat and add the grated cheese to it. This dish is awesome as you can hide any mistakes you make! I made probably the worst white sauce I have ever made - lumpy, lumpy, lumpy. I had no more milk otherwise I may have made a new one so I was forced to use it. The dish turned out just as good and you could never tell my sauce had any lumps in it!
Preheat your oven to 180C. You need a suitable dish which can hold the 12 tubes comfortably.
Pour half of the passata at the bottom of the dish. I add herbs to mine, whatever is in season or whatever I fancy that day. To fill the cannelloni - it is messy and there is no way round it. I used a piping bag - I cut quite a bit opening at the bottom. You will need to hold your tubes flat. I know it sounds tricky but it did work for me after the second one. Once all 12 tubes are filled arrange them into your dish. Pour over the rest of the tomato sauce. The cheese sauce is next - slowly pour it over, trying to cover as much of the tomato sauce as possible. Sprinkle with the last of the grated cheese and pop into the preheated oven for about half an hour. Serve warm and enjoy!

XoXo
Desi in the Kitchen
Thursday, 25 February 2016
HOMEMADE CHOCOLATE TRUFFLES

A bit too late I realised that the better quality chocolate you buy the nicer truffles you will eat. You live and learn they say. They are correct. Anyway, my truffles turned out very chocolatey, gooey and even my not-so-chocolate-loving husband thought they were a real treat. There is nothing sophisticated about making truffles. Absolutely nothing. Mix the ingredients, add some alcohol (always optional) then put in the fridge for about 4 -6 hours to set. Roll out balls and dust in nuts, coconut, cocoa powder... options are endless. Eat. I am serious - it is as simple as that.
Recipe: Makes about 30 truffles
250gr chocolate (I used 200gr dark cooking chocolate 54% and 50gr 85% very dark chocolate)
250 gr double cream
35 gr butter
pinch of salt
alcohol - brandy, wine, Baileys, whiskey .... I used none so the kids could eat them too
To cover:
cocoa powder, chocolate pieces, ground nuts.... your choice
Method:
Cut the chocolate into small pieces and put into a heat proof ball. Melt the butter with the cream in a small saucepan over low to medium heat. Just before boiling point take off the heat and pour over the chocolate. Keep stirring until the chocolate melts. I had to put the mixture in the microwave for about 30 seconds as it cooled down too quickly and the chocolate was not melting. Once the chocolate has completely melted add the salt (I did not use any) and the liquor if using.


Do you love chocolate? What would you put in your truffles?
XoXo
Desi in the Kitchen
Wednesday, 24 February 2016
DOUBLE CHOCOLATE AND WALNUT BISCOTTI
Who doesn't like a little treat with their afternoon cuppa?
 I am a type of girl who drinks coffee throughout the day and on rare occasions I treat myself to a piece of chocolate or a tiny slice of a cake that I had made. My husband is not big on chocolate but he is big on biscuits. A while ago he mentioned biscotti and I was instantly inspired. I hadn't had biscotti in at least 5! years and I had never attempted making them. You see, I thought it was so super complicated to make biscotti. After all you bake them twice!!! After some research I found a recipe that seemed just too good to resist. I mean what would you not like? Chocolate chips - yum! Walnuts -yum! Cocoa powder -yum! A super crunchy biscuit which is perfect for dunking - double YUM!!
Original recipe you can find here . As with all American recipes all measurements are in cups/sticks etc so I have converted them in grams for you below:
Recipe:
250gr plain flour
60 gr cocoa powder
90 gr butter at room temperature
1tsp baking soda
1tsp salt
2 large eggs at room temperature
200gr granulated sugar
100 gr chopped walnuts
100 gr dark chocolate chips (or more)
1 tbsp. icing sugar (optional) - I forgot to use and it still worked out fine
Method:
Turn the oven to 180C and line a large baking tray with some parchment paper. Set aside.
Cream the sugar with the butter until pale and fluffy. Add the eggs and beat until mixed well. Add the dry ingredients and mix until you get a very sticky dough. A stand mixer is perfect for this - the dough is super thick and sticky and very difficult to beat. If you have a hand held mixer you can simply use a spatula or a fork to combine thoroughly. Add the chips and walnuts.
 Divide in two or three and make chocolate logs with your hands. Some flour on your hands will help. I am the first to admit my logs look soooo different but being the first time I have attempted them I think they are okay. Make sure you leave space between them as they will expand during baking.
 Dust the logs with the icing sugar (which I forgot ) and bake in the oven for 35 minutes. Let them cool for 5-10 minutes and cut into pieces with a serrated knife. It is important the knife is serrated - these biscuits tend to crumble and a meat knife (which I originally used) was not very good. Do one cut at a time, take knife out and repeat. 2 or 3 cuts per biscuits will be enough.
 I know, it sounds like a lot of work but it is not. Besides it is all worth it at the end. Once cut lay the biscuits with the cut side down and bake for another 10-15 minutes until dry.
 Let them cool completely on a wire rack before eating.
Make yourself a cuppa, dunk and enjoy!

XoXo
Desi in the Kitchen

Original recipe you can find here . As with all American recipes all measurements are in cups/sticks etc so I have converted them in grams for you below:
Recipe:
250gr plain flour
60 gr cocoa powder
90 gr butter at room temperature
1tsp baking soda
1tsp salt
2 large eggs at room temperature
200gr granulated sugar
100 gr chopped walnuts
100 gr dark chocolate chips (or more)
1 tbsp. icing sugar (optional) - I forgot to use and it still worked out fine
Method:
Turn the oven to 180C and line a large baking tray with some parchment paper. Set aside.
Cream the sugar with the butter until pale and fluffy. Add the eggs and beat until mixed well. Add the dry ingredients and mix until you get a very sticky dough. A stand mixer is perfect for this - the dough is super thick and sticky and very difficult to beat. If you have a hand held mixer you can simply use a spatula or a fork to combine thoroughly. Add the chips and walnuts.


Make yourself a cuppa, dunk and enjoy!

XoXo
Desi in the Kitchen
Thursday, 4 February 2016
SAVOIARDI BISCUITS

Here we go:
This recipe makes about 24 ladyfingers
3 eggs
67 gr granulated sugar
1tsp vanilla essence
pinch of salt
64gr plain flour
30-50gr icing sugar for dusting
Method:
Preheat the oven to 180C. Lay parchment, silicon mat or baking paper on couple of trays.
Separate the eggs. Add the sugar, vanilla essence and salt to the yolks. Beat with a mixer until thick, pale and fluffy, probably around 3-4 minutes. In another bowl beat the egg whites until thick and stiff, peaks should stay firm. Depending on your mixer this can take anything from 3 to 7 minutes. Add the egg whites to the egg yolks in 3 batches, mixing slowly with a rubber spatula or a metal spoon. Wooden spoon will knock the air out. (I have no idea why, but that's what all great chefs say. I tend to listen.) Gently sieve the flour over the mix and slowly fold it in until it is all smooth.
Get a piping bag (I did not use a nozzle). Fill up the bag, cut the end off and pipe the biscuits onto the prepared trays. Dust well with icing sugar and leave to stand for 5 minutes.


Transfer to a cooling rack straight away and serve immediately.
You can store them in an airtight container for a couple of days. I was surprised with the result - they were pure heaven. So lovely, light and melting in the mouth... I only had 2! I had to dip the second one in my coffee to see how it is holding the liquid - after all I am making another tiramisu on Sunday and I will be using my homemade ladyfingers!
Easy, simple, delicious. Is all I'm saying. What do you think?

XoXo
Desi in the Kitchen
Monday, 1 February 2016
BANITZA - TYPICAL BULGARIAN DISH

Recipe:
2 packs of filo pastry sheets or 500gr
4 eggs
250-300 gr Bulgarian cow's cheese or Greek salad cheese
250 gr yoghurt
140 gr melted butter
Method:
Take the pastry sheets out of the fridge about 10 minutes before you need them. Butter a roasting tin really well. Cut the pastry to fit the tin, saving all extra pieces.
Beat the eggs with a fork until foamy. Add the crumbled cheese and yoghurt and mix well.
Put one sheet on the bottom of your tin. Spread melted butter over it. Put another sheet, add some more butter. Put another sheet - add a layer of the egg and cheese mix.


Thursday, 21 January 2016
CHICKEN AND PASTA BAKE

Recipe (to feed 2 kids twice)
170 gr pasta shells, amori, penne or macaroni work best
1-2 handfuls of diced chicken breast (1 big chicken breast should be enough)
Sauce:
35 gr butter
35gr plain flour
500gr milk
1tsp Dijon mustard (optional)
salt
a handful of grated cheese
Method:
Cook the pasta as per pack instructions.
If you need to cook your chicken breast do so now. Heat some oil in a pan. Cut the breast into thin strips or small cubes and fry them lightly, it should only take a couple of minutes. You can put some paprika in the oil if you want, for extra flavour.
To make the sauce melt the butter at low heat and add the flour to make the rue. Heat the milk in a pan or microwave until too hot to touch and add to the rue. Whisk lightly, you should have a smooth sauce in less than a minute. Up the heat slightly and stir until it has thickened. You want it quite runny as the pasta will absorb it whilst baking. Add the mustard if using and a good pinch of salt.
Drain the pasta and add to the sauce and chicken. Mix well and transfer to an ovenproof dish. Sprinkle with the grated cheese and bake in the oven for about 15-20 minutes until the cheese has browned nicely. Let it cool slightly before serving.

My kids, aged 4 and 6, absolutely loved it. It is simple, delicious and fun (I use different pasta shapes every time) and this is one of the recipes they would happily eat for 2 days in a row. I tend to sprinkle it with water before reheating the next day. It freezes well, make sure to defrost thoroughly before reheating again.
When I make this dish for the 4 of us I use more spices (like bay leaves) and tend to put some Red Leicester on top along with some deseeded tomatoes. You can change it according to your own preferences, it is that versatile.
XoXo
Desi in the Kitchen
Monday, 18 January 2016
DELICIOUS BROWNIE RECIPE
BROWNIES! Who does not like them? I know I do. I love them.

Hubby? Well, if you had offered him one an year ago he would've politely taken a bite, mumble something about how nice it was and then given me the rest when no one was looking. Then he quit smoking and his taste buds started to work properly again. He discovered he likes a)vegetarian food and b) chocolate. All of a sudden I had to share my chocolate guilty pleasures with him! I.had.to.share.my.MY.chocolate! I guess it was a tiny sacrifice on my part considering he gave up smoking:) So in all honesty I don't really mind sharing my chocolate. But back to why he now likes brownies. As he tells me, one of his colleagues brings brownies in the office quite often and he never liked/fancied them. A few months ago that colleague kept pestering him about having a bite so out of politeness (he is very Very VERY polite)he took one and finished it. And took another one, and another one. He was 'in heaven' apparently because they were 'soooo chocolaty and nice'.

Here is the recipe (makes about 18 squares)
225gr melted butter
400gr sugar (I used granulated sugar and it worked great)
4 eggs
60gr cacao powder
1/2 tsp vanilla essence (optional)
225gr plain flour
1/2 tsp baking powder
1/2 tsp salt
Method:
Preheat the oven to 180C. Mix the butter, sugar, cacao powder and eggs until well incorporated. Add the flour, baking powder and salt. Grease a 25x35 cm (or similar size) baking tray. Pour in the mixture and flatten lightly with a spatula. Bake for around 20 minutes for set brownies. If you want them more gooey, bake for about 18 minutes. Let your tin cool completely before taking out and cutting into squares (if you can wait that long).


XoXo
Desi in the Kitchen
Wednesday, 13 January 2016
QUICK AND TASTY WAFFLE RECIPE
My children love waffles.
 They are a rare treat in our house as I tend to make them on a Sunday when both children have had an exceptionally good week. Almost 10 years ago when we got married we were given a waffle maker which we never used until about 6 months ago Whilst clearing the garage my husband stumbled across it so I decided that we have it so we might as well start using it. Lucky for me it came with instructions and the easiest recipe for waffles I have ever seen!
All you need is 3 simple ingredients and if you are anything like me you will have all 3 in your kitchen on any given day.
So here it goes:
Recipe (makes 7-8 waffles)
a pot of cream, around 284 ml (I use whipped, double works well too)
200gr plain flour
200ml cold water
Whip the cream until it starts to thicken and soft peaks form. Mix the flour and the water until you get a smooth mixture. Add the whipped cream to it and stir until the cream is well incorporated.
 Cook the waffles as per your manufacturer's instructions.

It is as simple as that! The result is the most delicious crispy waffles which you can top up with anything you fancy. My son likes them with Nutella, my daughter prefers honey. Hubby is a jam eater and I finish mine off with some maple syrup.
They are truly gorgeous no matter what your topping. This quantity is enough for us 4 as a late breakfast on a Sunday.
Give them a try, I promise you will not be disspointed.
I would love to know how yours turned out:)
XoXo
Desi in the Kitchen

All you need is 3 simple ingredients and if you are anything like me you will have all 3 in your kitchen on any given day.
So here it goes:
Recipe (makes 7-8 waffles)
a pot of cream, around 284 ml (I use whipped, double works well too)
200gr plain flour
200ml cold water
Whip the cream until it starts to thicken and soft peaks form. Mix the flour and the water until you get a smooth mixture. Add the whipped cream to it and stir until the cream is well incorporated.


It is as simple as that! The result is the most delicious crispy waffles which you can top up with anything you fancy. My son likes them with Nutella, my daughter prefers honey. Hubby is a jam eater and I finish mine off with some maple syrup.
They are truly gorgeous no matter what your topping. This quantity is enough for us 4 as a late breakfast on a Sunday.
Give them a try, I promise you will not be disspointed.
I would love to know how yours turned out:)
XoXo
Desi in the Kitchen
Tuesday, 12 January 2016
A WONDERFULLY FILLING FISH PIE
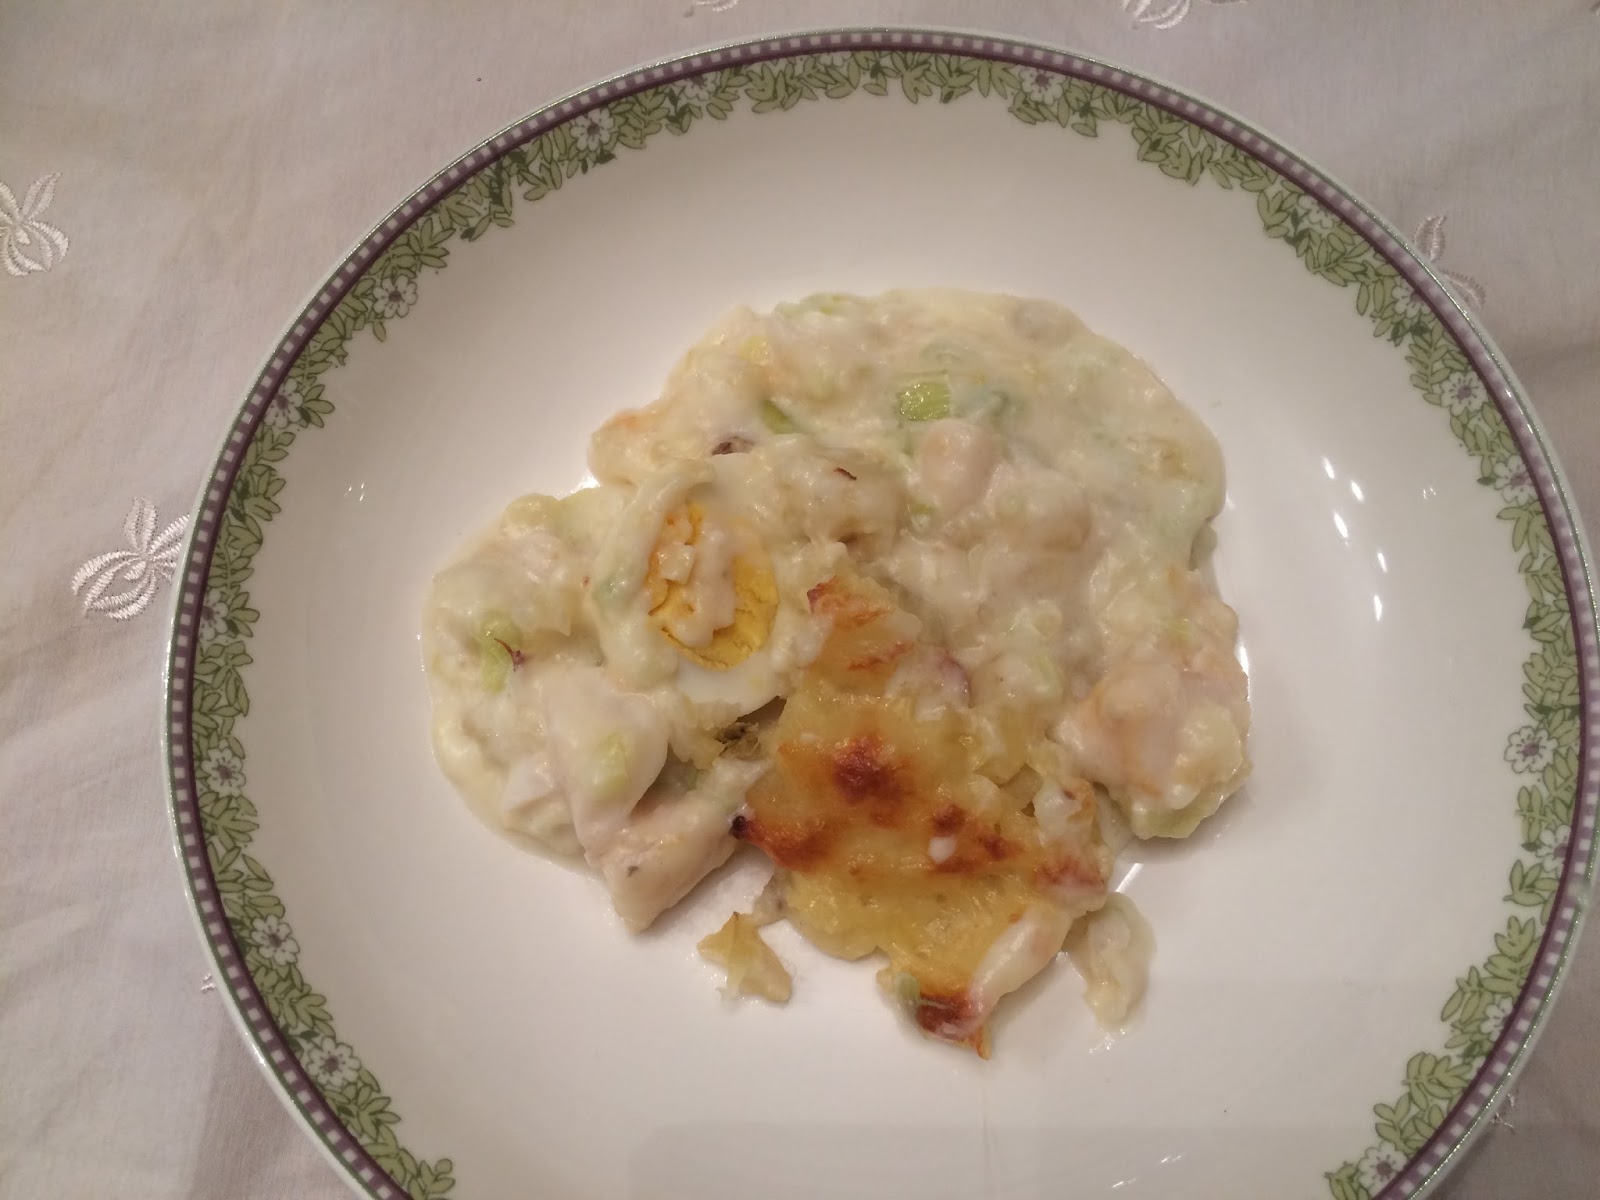
Years later I tried a cottage pie and I loved it. But then again I love meat. Hubby tried to persuade me to give the fish pie a go but I was always reluctant. Then 4 years ago I invited my father in law to dinner, thinking my mother in law was out of town for a few days and he would be lonely. I had planned cottage pie but I got a call from him telling him his wife was in town after all and she was coming to dinner too. You see the annoying bit was that mother in law is a vegetarian so cottage pie was out. In the playgroup I was taking my kids to at the time I asked around what I could cook and most mums recommended FISH PIE. So there I was making notes of how to make a fish pie. Up until then I was not big on leeks either but as I found out fish tastes so much nicer if you use them instead of onions. Over the years I stuck my recipe and it has been a hit every time.
A few nights ago I was going through the TV channels trying to find something decent to watch and Mary Berry was smiling at me, showing a quick chicken and pasta bake recipe. The reason I kept watching is because I got fascinated by how quickly her white sauce was ready. It has always taken me quite a while to make sure there are no lumps in it. I take the rue off the heat and stir, adding little bits of milk at the time until it is all incorporated. She however, poured all the milk in the pan and within less than a minute the sauce was smooth and thickening up! The secret?! The milk was HOT.
To tell you the truth I was very sceptical about it but decided to give it a go nonetheless. It worked. My sauce was ready in next to no time. What I love about the fish pie I make is that it is really rich and filling. I tend to make enough to feed my kids twice. They like fish pie but are not very keen on grilled salmon. It freezes very well too, defrost in the fridge overnight or at room temperature over 4-6 hours and heat thoroughly before serving.

Recipe: (to feed 4-6 people)
350gr fish pie mix
800gr potatoes
35gr butter
35gr plain flour
400ml milk, hot
50ml milk , cold
a handful of grated cheese
nutmeg
2 bay leaves
1 large leek (or 2 smaller ones)
4 eggs (optional)
salt and pepper
Method:
Chop the leek finely and fry for a few minutes in some oil. Add the fish pie mix and the cold milk to the pan and cook for 2-3 minutes at medium heat, stirring occasionally. Add the bay leaves - they give a wonderful aroma to the poached fish.
From the potatoes make mash. I do not add butter or milk to it as there is plenty of liquid in the sauce. Plus I want a nice, thick cover for the pie. I find adding milk to the mash makes it very soft and difficult to handle. To make the white sauce melt the butter and add the flour to it. Stir until well combined and a rue has formed. Add the hot milk and whisk lightly - under a minute you will have a smooth white sauce. Cook until it has thickened, stirring all the time to prevent it catching at the bottom of the pan. Mix the fish with the sauce and transfer into an oven proof dish. If you would like to make this pie extra special I suggest you hard boil 4 eggs and cut in half. Put the half in the pie, cover with the mash, sprinkle with the grated cheese and bake in a preheated oven to 180C for about 25-30 minutes until the cheese is golden brown. Serve hot.

Do you like fish pie? Or would you rather have cottage or shepherds one?
XoXo
Desi in the Kitchen
Thursday, 7 January 2016
OYSTER MUSHROOMS AND MASCARPONE PASTA WITH HOME MADE CHEESY BREADCRUMBS
For me it is a time of the year when I look very closely at what I eat. New Year New Me seems to be my motto for the month of January every year and 2016 is no exception. Having eaten a vast quantity of turkey, ham, sausage rolls and pigs in blankets over the festive period I feel it is time for a week of vegetarian dishes.
So my first one is a delicious pasta dish which takes under half an hour to cook. Ta da! This easy and simple meal requires no special skills whatsoever and is guaranteed to help you fall in love with cooking.
 Those of you who know me well know that I am not a fan of pasta. I avoid eating it, especially in the evenings. (More about this is coming up in my new category KEET FIT next week). Hubby and kids love it and I cook it for them often but I tend to stay away from it. This recipe is one of my 'guilty pleasures'. There is something about the combination of mascarpone, mushrooms and pasta that I cannot resist. Because I am back in the gym (yes, I am sticking to my goal) and I needed a filling meal after another gruelling workout a little treat to myself just happened to be on the cards last night ;)
The first time I made this recipe was many years ago and it has been a favourite of my husband ever since. He is a guy who likes his meat and is not a big fan of veggie dishes but even he admits this is a MUST TRY pasta dish. The cheesy breadcrumbs give the pasta another dimension and is a great way of using up old/stale cheese you may have in your fridge following Christmas. This is a very rich and filling dish and little goes a long way.
Recipe (to feed 2)
about 150gr pasta (any shapes you like/have), I used fusilli simply because this is what I had
150gr oyster mushrooms/ you can substitute with any exotic mushrooms
1 tub (250gr) mascarpone
2 slices of bread
a handful of grated cheese
salted butter
Cook the pasta as per the pack instructions. Cut the mushrooms into chunks and fry in some of the butter on medium heat until edges start to brown. Mine took about 7 minutes.
 Whilst the mushrooms are cooking make the breadcrumbs. I used my blender for this - it only took 2 minutes! Fry the breadcrumbs in the remaining butter on medium heat stirring often to prevent burning.
 When they've browned add the grated cheese. Again, stir continuously to avoid burning. (I find extra mature to work really well - as it melts it helps the breadcrumbs to clump together in small clumps. Mild cheddar will make them into bigger chunks).
 Once the mushrooms are cooked, turned the heat to minimum and add the mascarpone. It is a very rich and creamy cheese and the heat helps it melt.
 Keep stirring until no chunks are left and the mushrooms are well coated. If you haven't used mascarpone before you need to know that it is a very bland tasting cheese. It is perfect for deserts but it goes really well with mushrooms too as it helps bring the flavour out of the mushrooms without overpowering them.
To serve pour the sauce over the pasta
 and add a good spoonful or two of the breadcrumbs.
 It goes well with red wine.
The picture above is my portion, small but fabulously delicious and filling.
So my first one is a delicious pasta dish which takes under half an hour to cook. Ta da! This easy and simple meal requires no special skills whatsoever and is guaranteed to help you fall in love with cooking.

The first time I made this recipe was many years ago and it has been a favourite of my husband ever since. He is a guy who likes his meat and is not a big fan of veggie dishes but even he admits this is a MUST TRY pasta dish. The cheesy breadcrumbs give the pasta another dimension and is a great way of using up old/stale cheese you may have in your fridge following Christmas. This is a very rich and filling dish and little goes a long way.
Recipe (to feed 2)
about 150gr pasta (any shapes you like/have), I used fusilli simply because this is what I had
150gr oyster mushrooms/ you can substitute with any exotic mushrooms
1 tub (250gr) mascarpone
2 slices of bread
a handful of grated cheese
salted butter
Cook the pasta as per the pack instructions. Cut the mushrooms into chunks and fry in some of the butter on medium heat until edges start to brown. Mine took about 7 minutes.


To serve pour the sauce over the pasta


The picture above is my portion, small but fabulously delicious and filling.
It was enough for me but I could've eaten more. Lucky for my KEET FIT routine hubby had already polished everything else!
What is your favourite pasta dish? Care to share?
XoXo
Desi in the Kitchen
Thursday, 10 December 2015
COOKIE DOUGH POTS
Things have been a bit quiet in Desi in the Kitchen the last few days. I have been on Twitter only once if I recall correctly and haven't posted anything since Friday. I have been 'offline' because I needed a break. I needed to have a day to myself
Thursday, 3 December 2015
POACHED EGGS OVER WHITE CHEESE
This Instagram picture attracted a few likes and a few new followers so I thought I would share a traditional Bulgarian recipe.

Feeds 1:
3 eggs, the fresher the better
Bulgarian soft white cheese/Greek salad cheese/Mozarella (or a combination) , around 100-150gr
Poach the eggs as you like them. Leave them on

Feeds 1:
3 eggs, the fresher the better
Bulgarian soft white cheese/Greek salad cheese/Mozarella (or a combination) , around 100-150gr
Poach the eggs as you like them. Leave them on
Wednesday, 2 December 2015
ONE POT CHICKEN ALFREDO
This is one of these recipes which will leave you wondering why on earth you haven't ever made it/haven't made it in a while. It is so easy, so delicious and most importantly if your kids love pasta, they will love chicken Alfredo too!
 Although I love challenging myself in the kitchen I prefer to do it during the day when the kids are at school. Yesterday it was a completely different story - I was home for about half an hour just before school pick up and then me and the kids didn't get back till 4:30pm. With football practice starting at 6 pm I was seriously pressed for time to make them a homemade meal, that's not just sandwiches or cheese on toast. I remembered I had some

Friday, 27 November 2015
BUTTERNUT SQUASH AND BACON QUICHE
Yes, me again making a quiche.
 I simply cannot resist them. Besides it has been at least 10 days since I last baked one. It is the season of the squash after all so I always seem to have one in the kitchen. Since my baking disaster the other day I fancied using some Bulgarian white cheese too. My original aim was to make a simple roasted squash and cheese quiche. Whilst the squash was roasting I suddenly remembered I had some bacon that had to be used. Urgently. I did not have enough eggs to make quiche Lorraine so I wondered

Wednesday, 25 November 2015
BULGARIAN CHEESY BREAD
Dear all,

it has been one of those days. You know what I mean - one of those days when nothing goes your way. In the morning I decided that I would work on another post instead of making cookies with khaki fruit (I will tell you all about this another time). 2 hours later I had achieved absolutely nothing. My review of a night cream I recently received as a birthday gift was simply not going anywhere. A cup of coffee and light lunch later I all of sudden remembered I had bought some fresh yeast a couple of days ago which had to be either used or thrown away. I am against waste so I thought I would make a Bulgarian cheesy bread. I used to love it as a child. I admit is full of calories but boy does it taste good! It is a doughy savoury dish which can be eaten as a breakfast or at snack times. It was very popular last time I made it (about an year ago) so it seemed like a good time to make it again. My usual recipe bothered me somewhat - I kept reading it over and over again and something just did not feel right. So I googled more recipes of a similar nature and found one from a popular Bulgarian food and recipe site. And this turned out to be one of my baking disasters in ages! (Keep reading, you know you want to find out what went wrong!)

it has been one of those days. You know what I mean - one of those days when nothing goes your way. In the morning I decided that I would work on another post instead of making cookies with khaki fruit (I will tell you all about this another time). 2 hours later I had achieved absolutely nothing. My review of a night cream I recently received as a birthday gift was simply not going anywhere. A cup of coffee and light lunch later I all of sudden remembered I had bought some fresh yeast a couple of days ago which had to be either used or thrown away. I am against waste so I thought I would make a Bulgarian cheesy bread. I used to love it as a child. I admit is full of calories but boy does it taste good! It is a doughy savoury dish which can be eaten as a breakfast or at snack times. It was very popular last time I made it (about an year ago) so it seemed like a good time to make it again. My usual recipe bothered me somewhat - I kept reading it over and over again and something just did not feel right. So I googled more recipes of a similar nature and found one from a popular Bulgarian food and recipe site. And this turned out to be one of my baking disasters in ages! (Keep reading, you know you want to find out what went wrong!)
Tuesday, 24 November 2015
MADEIRA CAKE - SIMPLE BUT GORGEOUS
Dear all,
last week I went to my local shop to buy a few things. I am not sure what I was thinking (or where my head was exactly) but all of a sudden I thought I needed eggs. Loads of them. 15 minutes and 12 large eggs later I was home to find out that I already had 5 eggs in my egg basket. Sigh.

In search of a good way to use them up I decided to bake a cake as an afternoon treat for my kids. Somewhere in my mind was the notion that Madeira cake uses loads of eggs
Subscribe to:
Posts (Atom)